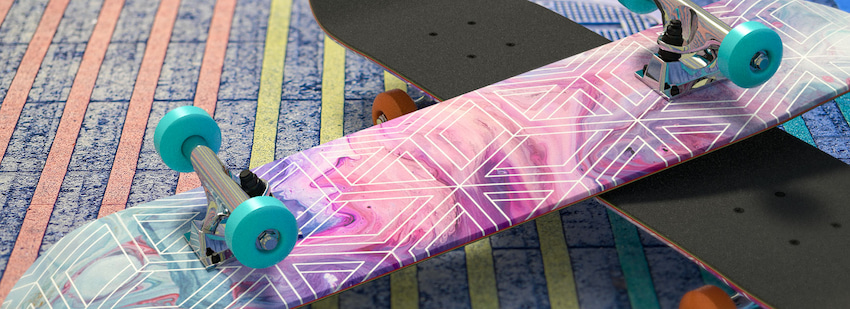
Skateboarding isn’t just an extreme urban sport, it’s an expressive one. It’s a whole culture that allows you to show your personality. You can show off your style with the way you ride, dress, and choose the board. The board doesn’t affect your performance only; finding the right skateboard for you can make your style shine the next time you roll on the wheels.
Why Build Your Own Skateboard?
There are two options when it comes to skateboards: you can buy a whole skateboard and build one using different parts. There’s no right or wrong here – it all comes down to personal preference. Either way, it’s best to buy skateboard online or the different parts from a store that offers top-quality and high-performance skateboard brands. That way, you’ll ensure that every element is suitable for your ride.
Deciding on building your skateboard over buying a complete one can give you the freedom to create a board that suits your ride and your aesthetics. It can be very helpful if you’re indecisive and it’s hard to choose from the various available options. Everyone who has done it knows it: there’s something special about your first custom skateboard.
Is Building a Skateboard Easy?
Now that you’re hooked up, probably the next thing you want to know is if building a skateboard is easy. While it may be daunting looking at all the parts of a dissembled board for the first time, it’s a pretty simple job to do. All you need is a list of the parts you need, some basic tools and an easy step-by-step guide like the one you’re reading. And once you do it, you’ll be confident to change parts and help your friends with their boards.
What Do You Need to Build a Skateboard?
Before you start, you should ensure you have all the necessary parts and tools. That way, you can avoid any inconvenience and unnecessary trips to the store or additional online orders. Here’s a list of what you need:
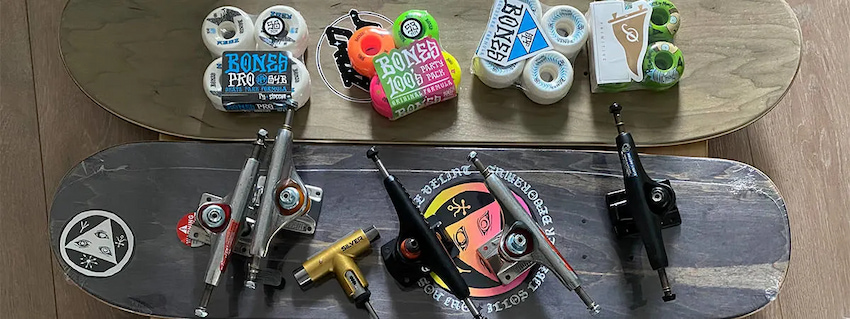
- 1 skateboard deck
- Grip tape (some decks come with applied grip tape; if not, you’ll need to apply it for yourself) + razor blade or crafting knife
- 2 trucks (required hardware such as bolts included)
- 4 wheels
- 8 bearings
- 4 bearing spacers
- 1 skate tool
- 1 skateboard hardware kit (8 nuts and bolts)
Step-By-Step Guide to Building Your Own Skateboard
Now that you’ve got all the skateboard parts, you can get down to business. It’s really fun and easy. And, if you run into issues, you’ll have a better understanding of what’s causing them. This can help you know if there’s something wrong with your board in future.
1. Apply the Grip Tape to Your Deck
You can skip this step if your deck is already gripped. If it’s not, you need to apply it for yourself. This may be the most challenging part if you’re new to it. If you don’t feel like you can make it, choose a gripped deck when you buy skateboard online. Here are some tips to make this first step as easy as it can be if you do feel confident to do it.
- Make sure the tape covers your board. Narrower boards are less challenging than 8.5″ decks, but a standard grip fits them too.
- Take off the plastic entirely and place it on the deck’s tail or nose to check it aligns properly.
- Work your way slowly by tapping the grip tape.
- Scrape the edges with a blunt object, such as a screwdriver. Try doing this firm and quick so you can get a nice cut, making a thin line.
- Cut the edges with a razor blade or a crafting knife.
- Using some of the grip tapes leftovers, rub the edges for a cleaner look and to prevent peeling.
- Puncture the holes where you will place the bolts. This will make it easier to attach them later on.
- Push the air bubbles out, so they turn into bigger pockets later on.
2. Insert the Bolts
The next step is to punch the screws into the bolts you made. If you haven’t punctured them earlier, it’s time to do it. This can’t go wrong: just punch a hole using a screwdriver or the bolts to push the tape back.
There are 8 holes on the skateboard’s deck to accept the 8 truck bolts that fasten the truck to the board. Once you pop the holes through, insert the bolts through them.
3. Attach You Trucks
This is a very important step. Not getting it right will cause your skateboard to turn in the wrong direction and perform badly.
First, you need to attach your trucks and tighten up the nuts on the bolts. Avoid using power tools as they can over-tighten the truck bolts, leading to stress cracks that weaken the deck.
Second, and most importantly, make sure the trucks are the right way round: the big kingpin nuts should be both facing each other towards the middle of the board.
4. Fit the Bearings Into the Wheels
You’ll need 8 bearings or 2 per wheel. If you have open bearings, put the open side on the inside of the wheels so they won’t get dirty. Also, if you have graphics on the wheels, place the graphics on the outside. This doesn’t affect performance, but it looks better.
Place the first bearing in the wheel: you can use your hands to push them in a little. Then, place the wheel and bearing on your truck’s axle, applying some pressure. Push the wheel over the axle and the bearings until you feel it slides into place. Then flip the wheel over and push down again onto the next bearing. Repeat for all 4 wheels.
Important note: Some wheels might be harder to push onto bearings. You may need to apply some pressure or push hard. However, don’t use a hammer or bang bearings into wheels, as it can damage your new bearings. Skateboard bearings aren’t designed for the side load.
5. Attach the Wheels
The last step is to fit the wheels to the truck axles. Having a small speed ring washer on each side of the wheel will prevent the bearings from spinning freely. Then, tighten the axle nuts gradually. The wheels should spin freely while not being able to move up and down the axle too much. The only thing to be careful of is not to screw the axle nuts too tight, as it could destroy your bearings.
6. Congratulations! You Did It!
Your new stylish skateboard is now ready to ride. Now that you’ve come this far, you better understand your board and how it functions. You can manage all the repairings it’ll need in the future and replace parts when they get damaged.